How to Adjust the Frequency Range in Lightburn For Your Fiber Laser
When I began my fiber laser journey and I was learning to fiddle around with different settings, my Lightburn was set to a max of 50 KHz. To me, being a newbie, that didn't seem to matter. I would adjust from 20-50 KHz and think it was making a difference. But, as I continued to learn, i began to understand how a higher frequency would produce different results. But, how do I get that higher frequency? Well, as the song goes, "we get by with a little help from our friends." A quick call from a friend, and now I have a frequency range from 5-500! What?! You want to adjust your frequency range too?! Well, you are in luck, I am here to walk you through it!

First, the above photo will show you were you can adjust the frequency for each job, in the CUTS/LAYERS.
Now! How to get that beautiful range of 5-500!
Click on the WRENCH symbol and it will open up DEVICE SETTINGS.

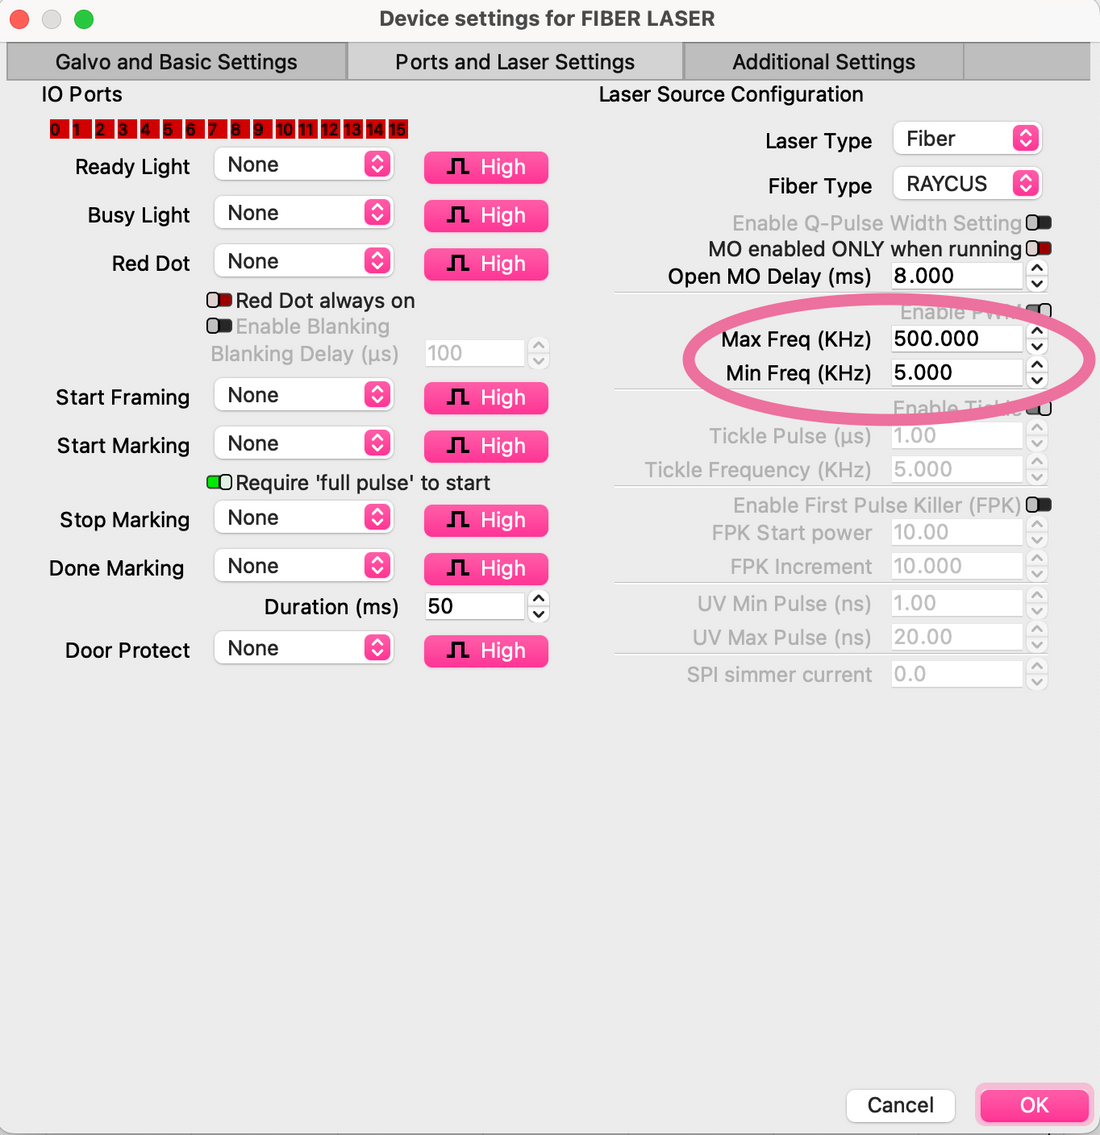
Here you will see 3 tabs, Galvo Settings, PORTS & LASER SETTINGS, Additional Settings. You want to navigate to the ports and laser settings. Now, your screen may not look exactly as mine, but these will be the tabs that will help you find it. In Ports and Laser settings you will see a MAX Freq and MIN freq field. This is where you will want to change those numbers to give you that nice big range! 
There you have it! Your fiber laser now has a huge frequency range to allow you to master your perfect settings for each material!
And, if you need a more visual walk through, you can head over here to my YouTube channel and watch the video there!