
Little Trade Secret
Share
A Mom, a Creator, and a Little Secret About Staying Prepared
As a Mom and someone who loves to create, I find myself often volunteering for school events, church gatherings, community projects—you name it. I genuinely enjoy lending a hand and being part of the action, so it’s rare for me to say no. But here’s the thing I’ve learned along the way: to truly make an impact, having my own personalized tools and supplies is a game-changer.
You see, in the whirlwind of helping out, I’ve noticed that many people come unprepared—showing up with good intentions, but often missing the essentials. And I can't tell you how many tools and supplies I’ve lost or had to replace because of this. That’s why I started personalizing my own tools. They become not just functional, but also a reflection of my passion and style—plus, it keeps track of my stuff in the chaos!
In this tutorial, I’ll show you how to turn your everyday office and craft tools into personalized masterpieces—making them easier to spot, stay organized, and add a dash of fun to your helping hand. Let’s get started on creating tools that are as unique as the projects you love!
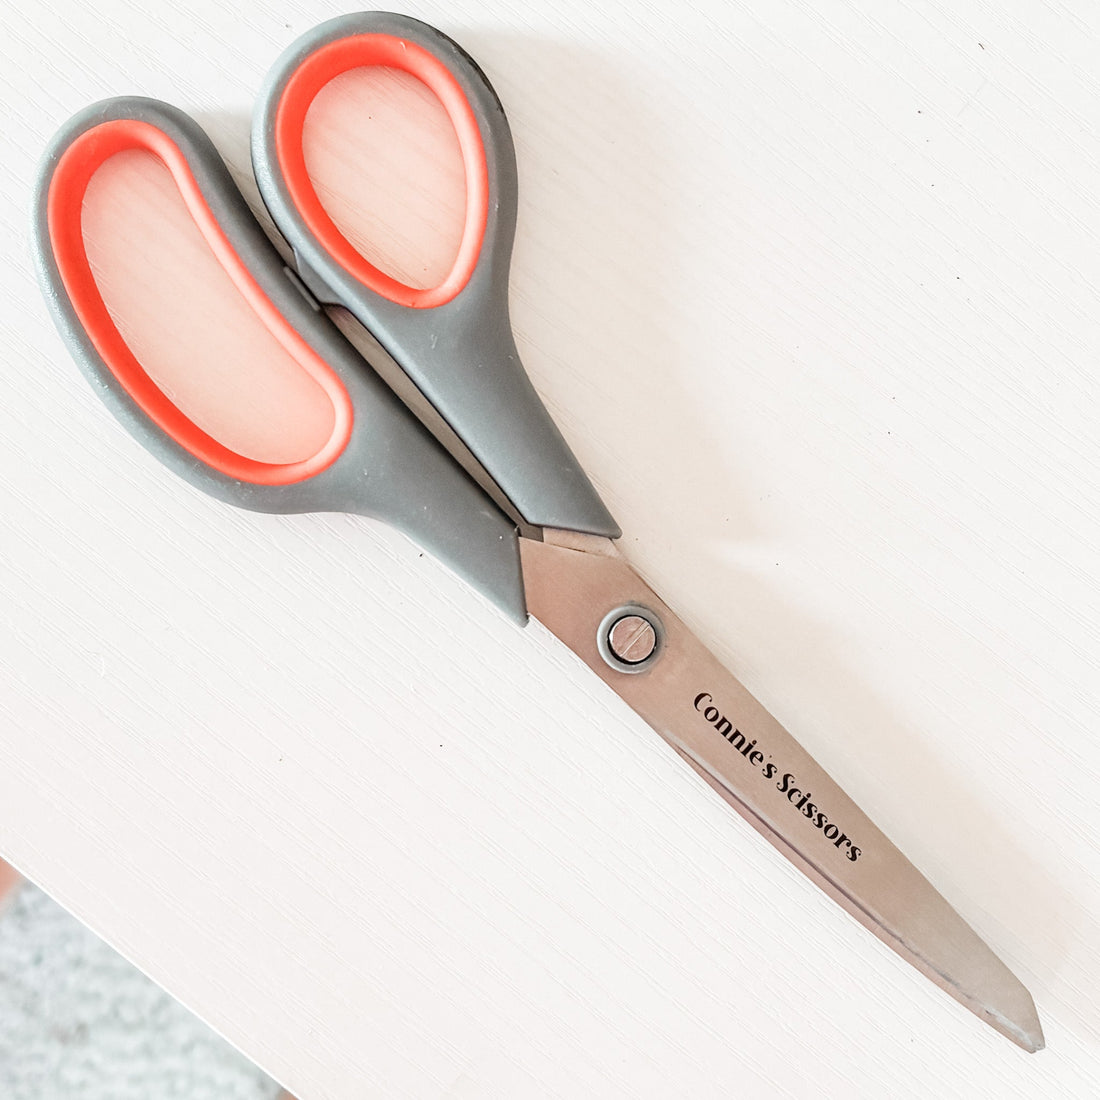
Claim Your Scissors!
Everyone loves a trusty pair of scissors — and as a maker, you probably have that one favorite pair you reach for all the time. But here's the thing: those scissors have a funny way of disappearing when you need them most!
No worries anymore. Once you personalize your scissors with your name or a fun label, they'll be unmistakably yours—no more mix-ups or lost tools. Plus! When people see your unique customization, they’re bound to ask questions, giving you the perfect opportunity to share what you do and showcase your craft.
Let's get those scissors claiming their spot as *your* pair—because personalized tools are the key to staying organized and inspiring conversations!
For the Scissors I am showing you today, I am using iBayam scissors from Amazon.
I ran this at 300 speed, 50 power, LPI 847, 120 frequency, and 3 passes
Now, the nice thing about annealing (which is what I did here) is that you can go over the marking several times until you reach the color you want. These are just suggested starting points—if you have different scissors, these settings might not be perfect, but it’s worth trying! With a little experimentation, you'll find the perfect look for your tools.